Metal casting, a process dating back millennia, empowers you to transform molten metal into intricate shapes and durable objects. From jewelry to sculptures, the possibilities are boundless. This guide will equip you with the foundational knowledge to embark on your metal casting journey.
Essential Materials:
- Furnace or Crucible: The heart of the operation, used to melt your chosen metal. Propane furnaces are common for hobbyists.
- Casting Metal: Aluminum, bronze, and silver are popular choices for beginners due to their lower melting points.
- Molding Material: Plaster of Paris, sand, and cuttlefish bone are commonly used. Consider your project’s complexity and the metal’s temperature.
- Crucible Tongs: Essential for safely handling the hot crucible.
- Safety Gear: Protect yourself with heat-resistant gloves, a face shield, and a leather apron.
Step-by-Step Process:
- Design and Mold Creation: Begin by sketching your desired object. Then, create a mold with a cavity that mirrors your design. This mold can be carved, 3D printed, or assembled from various materials. Remember to include a pouring channel and air vents to facilitate a smooth casting.
- Preparing the Metal: Cut your chosen metal into small pieces to expedite melting. If using scrap metal, ensure it’s clean and free from contaminants.
- Melting the Metal: Don your safety gear and carefully place the metal pieces into the crucible. Heat the crucible in the furnace, monitoring the temperature closely. Different metals have different melting points, so refer to a reliable resource for guidance. Avoid overheating, as it can degrade the metal’s quality.
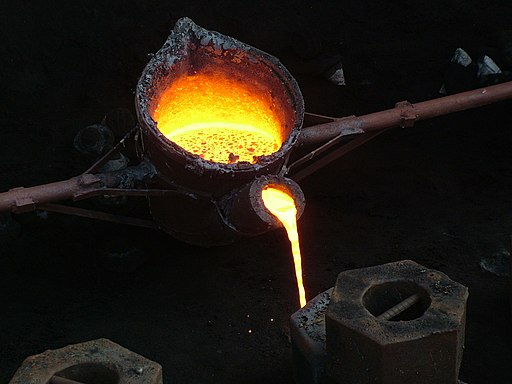
- Pouring the Molten Metal: Once the metal is completely melted, use crucible tongs to carefully pour it into the mold’s pouring channel. Do this in a smooth, continuous motion to prevent air bubbles from forming.
- Cooling and Demolding: Allow the metal to cool completely. This time varies depending on the metal and mold size. Once cooled, carefully break or separate the mold to reveal your casting.
- Finishing Touches: Remove any excess metal from the pouring channel and air vents. Sand, polish, or paint your casting to achieve the desired finish.
Pro Tips:
- Preheat Your Mold: Warming your mold before pouring reduces the risk of thermal shock to the metal, resulting in a cleaner cast.
- Experiment with Patinas: Apply chemicals or heat treatments to your finished casting to create unique colors and surface textures.